Getting Started with RoseRocket
This page will help you get started with RoseRocket. You'll be up and running in a jiffy!
📝 Authentication
In Rose Rocket
Some initial setup is required in your organization's environment in order for authentication to proceed. Your integration needs to be registered as an official 'App', or the API will refuse connections outright. Please execute the following steps; reference points can be found in the provided screenshots.
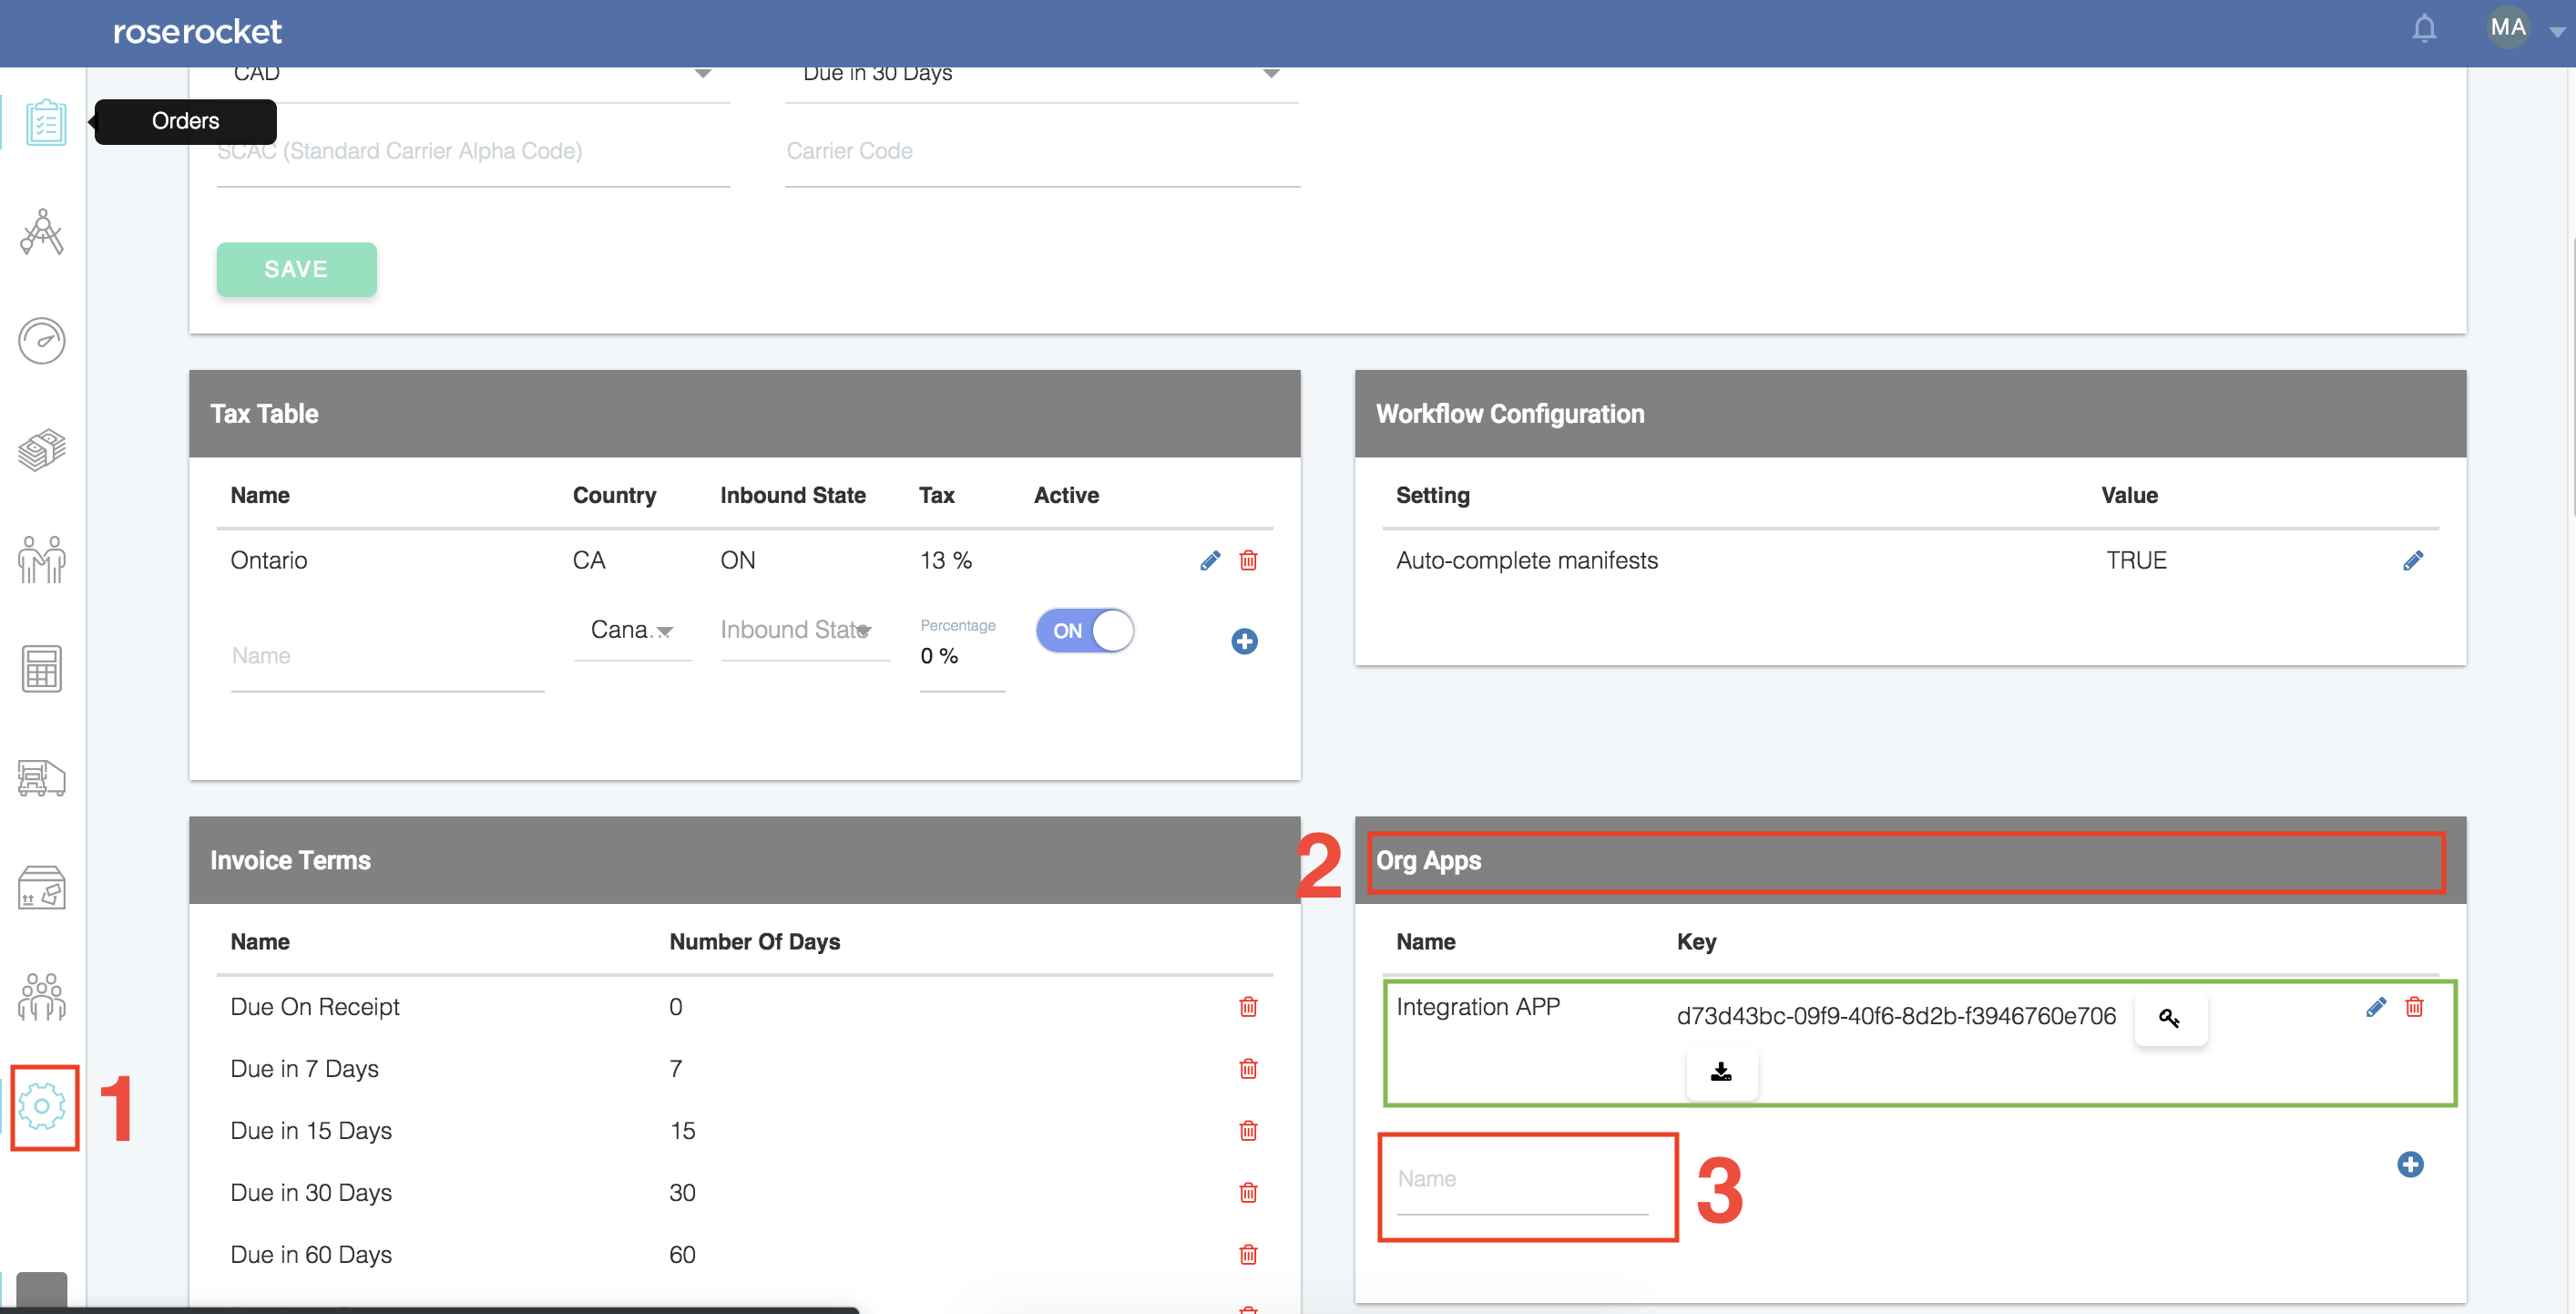
- Navigate to your organization configuration screen [1] and scroll down to the section labelled 'Org Apps' [2]
- Fill out the 'Name' [3] field with any name that will help you identify the use of this key (ex. "My Integration Application") and click on the 'plus' icon.
- On success, you will see immediate confirmation, much like the example key in the screenshot, outlined in green.
In Postman
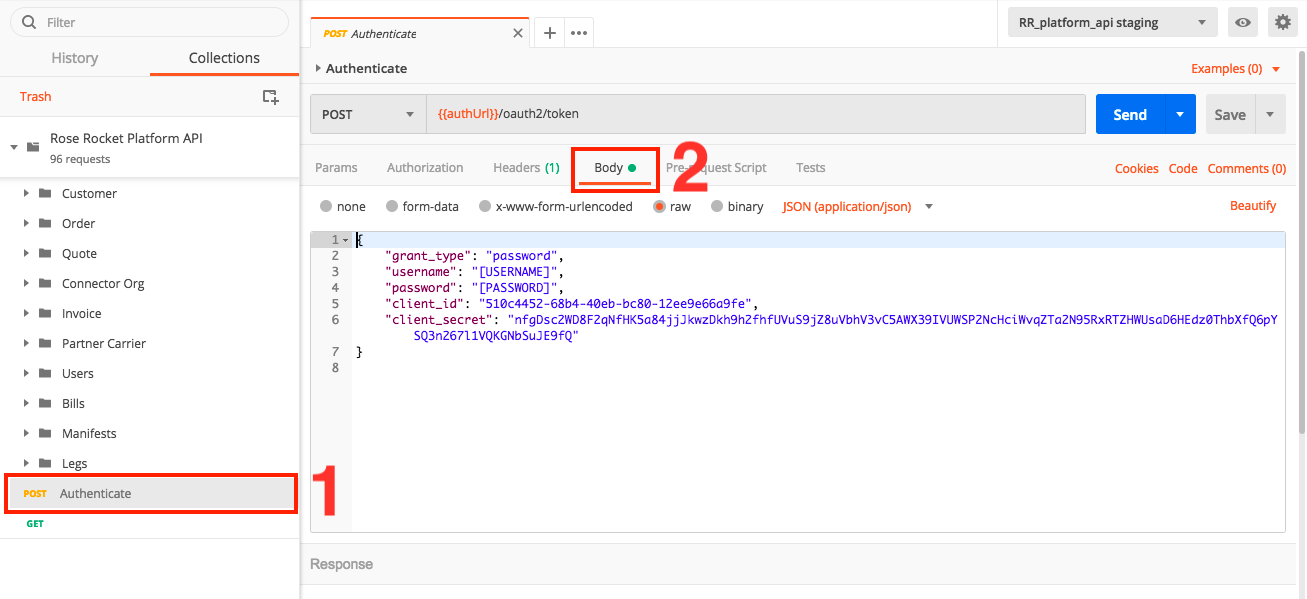
- In the left navigation, please select the 'Authenticate' action [1]
- Update the Request body by selecting the 'Body' tab in the submenu [2]
- Update the username and password fields with your RoseRocket Login Credentials
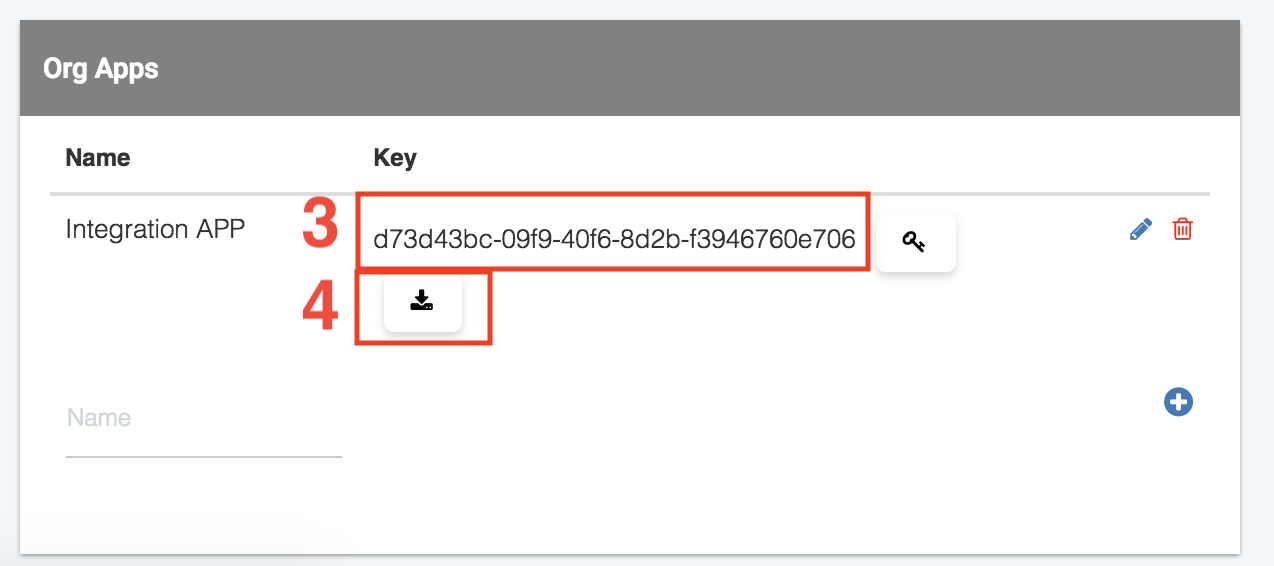
- Update the 'client_id' with the Org App Key [3].
- Update the client_secret. The secret key is not visible in the UI, but will be copied to your clipboard when you click on the secret–key button [4].
Postman Auth Completion
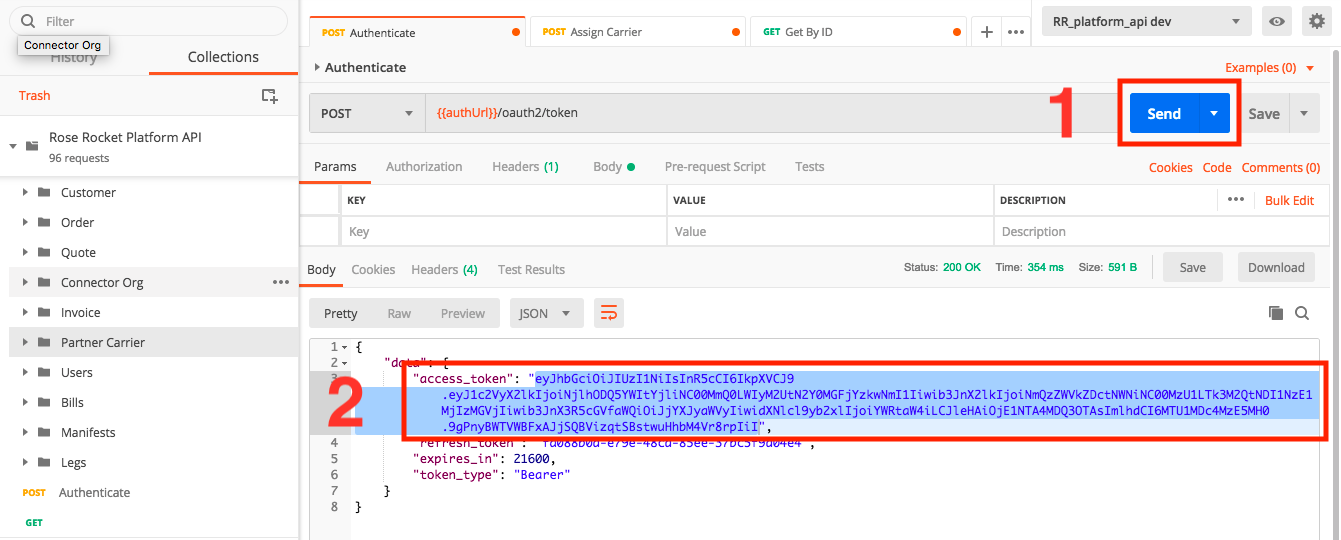
Once setup is complete, clicking on the 'Send' button should respond with a positive response, including an access token. As stated before, this access token will only be valid for 24 hours, and is required for all requests into the system.
Once these steps are complete, every POSTMAN request will contain the access token in their headers, opening up access to the rest of the API.
Using the included access key, you will need to update your headers, by following these few steps:
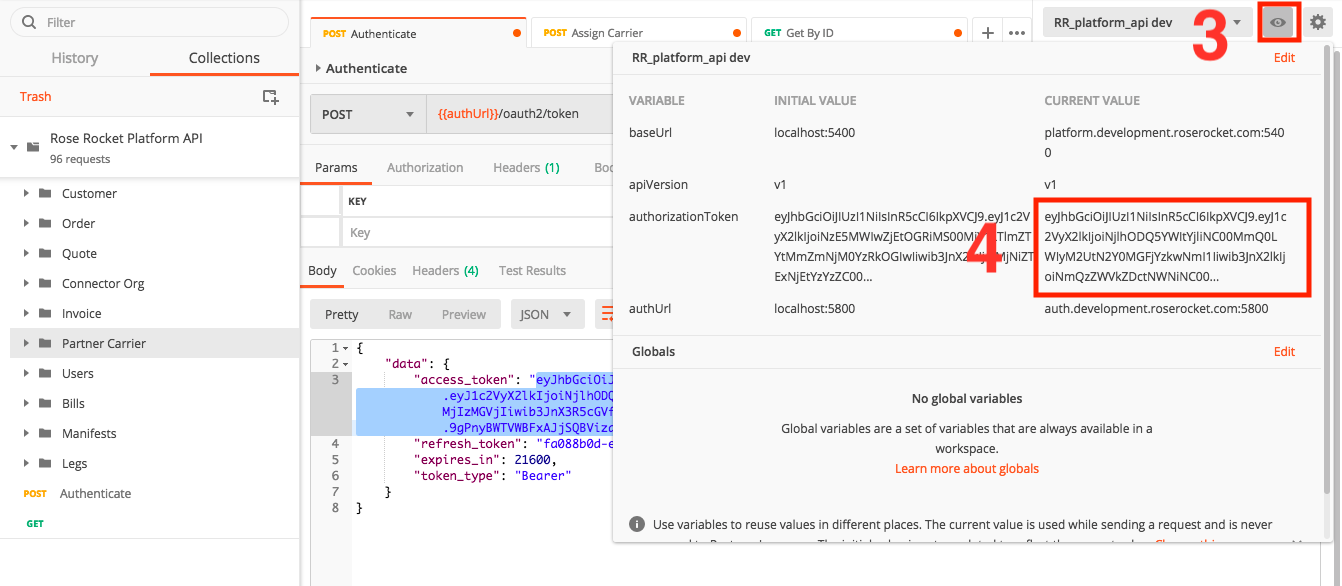
- After click 'Send' [1], the response body will contain a JSON object, with an attribute listed as 'access_token' [2]. Copy it for step 2.
- Click on the 'Environment Quick Look' in the top toolbar [3] to open the submenu.
- Update the 'authorizationToken' [4] with the field copied from step 1.
Updated about 2 months ago
